I’m always looking for new ideas for making more groceries for dolls… Below you can see I cut out little logos from a box of pasta that came out of our real family pantry. Then I decided to make tiny windows for my 18 inch sculpture that could see through, just like real pasta boxes from our local market!
Support list:
- Oven-baked Sculpey Clay
- white school glue
- Lightweight cardboard (recycled cereal box)
- Yellow acrylic paint
- scrap foam (alternative tissue paper)
- blue paper
- Pasta brand labels (cut out from a pasta box)
Step-by-step directions with pictures
 |
| Broken windows and logos Cut from a real pasta box. |
Cut the box side windows out of the cardboard. Roll or paint this side in a bright dark color; I chose to make the pasta boxes blue but you can choose any color you like. Then I glued the cut out logos to the fronts of the box.
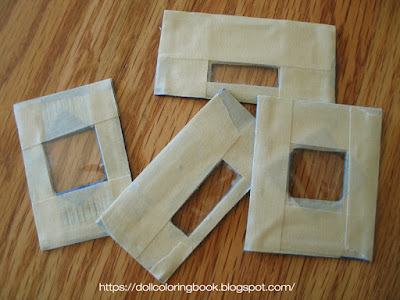 |
| Clear plastic covers Paste and tap it in place. |
Then I glued and taped a plastic cover to the back side of these box fronts. I then cut long, narrow strips of cardboard and carefully glued the side panels to the outside edges of the box fronts using white school glue. Let it dry.
 |
| The foam keeps the noodles in front window after all is closed. |
I filled the spaces around the windows with foam and taped them in place. Next, I sculpted little pasta shapes using oven-baked clay, baked them and then painted the pasta yellow. Each window requires a few pieces of pasta to fill the windows. I glued them to the prepared back side of each box, let them dry and then brushed on Mod Podge on each side to keep the finished surfaces clean for play and display.
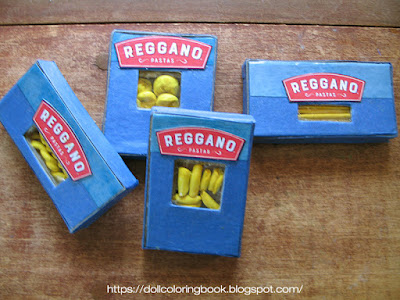 |
| Doll-sized ready-made pasta boxes Look like the real thing! |
See more doll noodle crafts: